Flower Painted Rocks Craft

If you’re looking for a creative craft for your child, check out this Flower Painted Rocks Craft! It’s not only a lot of fun to make, but every child loves to paint on surfaces.
And if you don’t want to tell your children that they can only paint on canvas or paper, why not let them use their artistic creativity on rocks instead?
We love painting on rocks because it helps us find a creative outlet that is often times free. Besides the paint, which we already have in abundance, there are so many rocks that we can paint and display easily.
The best part about painting rocks is that it’s a fun craft that can be done all year long. This type of painting activity gives the kids complete freedom to create beautiful flowers on various rock sizes as well.
>> More Easy Painted Rocks Ideas
Flower Painted Rocks
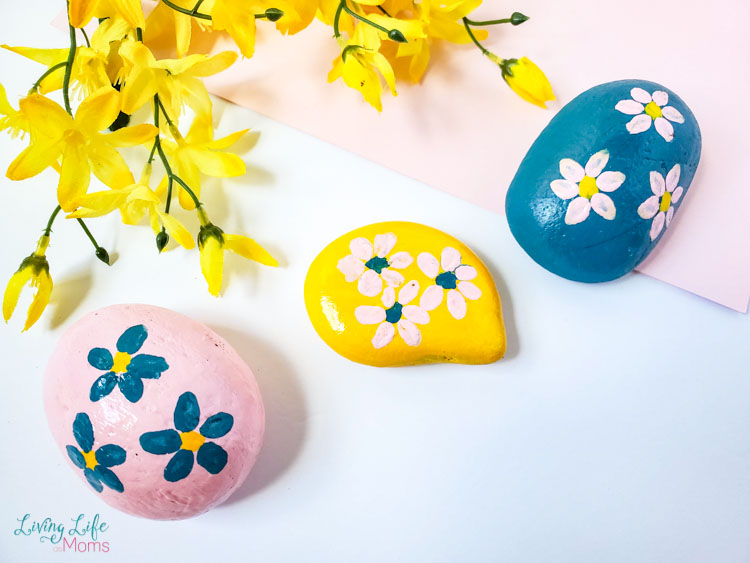
Aren’t they just beautiful! We’ve painted so many rocks during our creative time at home that it’s a wonder that we have any plain ones left.
As you can see from the picture below, the flowers that the kids are going to be painting are simple and the background color is what really stands out.
Make certain to do this craft activity outdoors or lay down some newspaper so that there isn’t a huge mess!
Fun Ways to Share Your Painted Rocks with Others
Painting rocks is actually a popular activity all over the globe. There are even some places that hide them around their town.
Check out and see if there is a group in your town that paints and hides rocks. Painting rocks is a fun craft but hiding them for others to find is a lot of fun, too.
You can hide them in parks or other various areas and people love finding them!
Supplies needed for flower painted rocks craft
- River Rocks
- Acrylic Craft Paint – various colors
- Paintbrush (1-inch)
- Slanted paintbrush
- Paintbrush with a pointed tip (optional)
- Krylon Clear Glaze
- Newspaper or other barrier
How to make Flower Painted Rocks
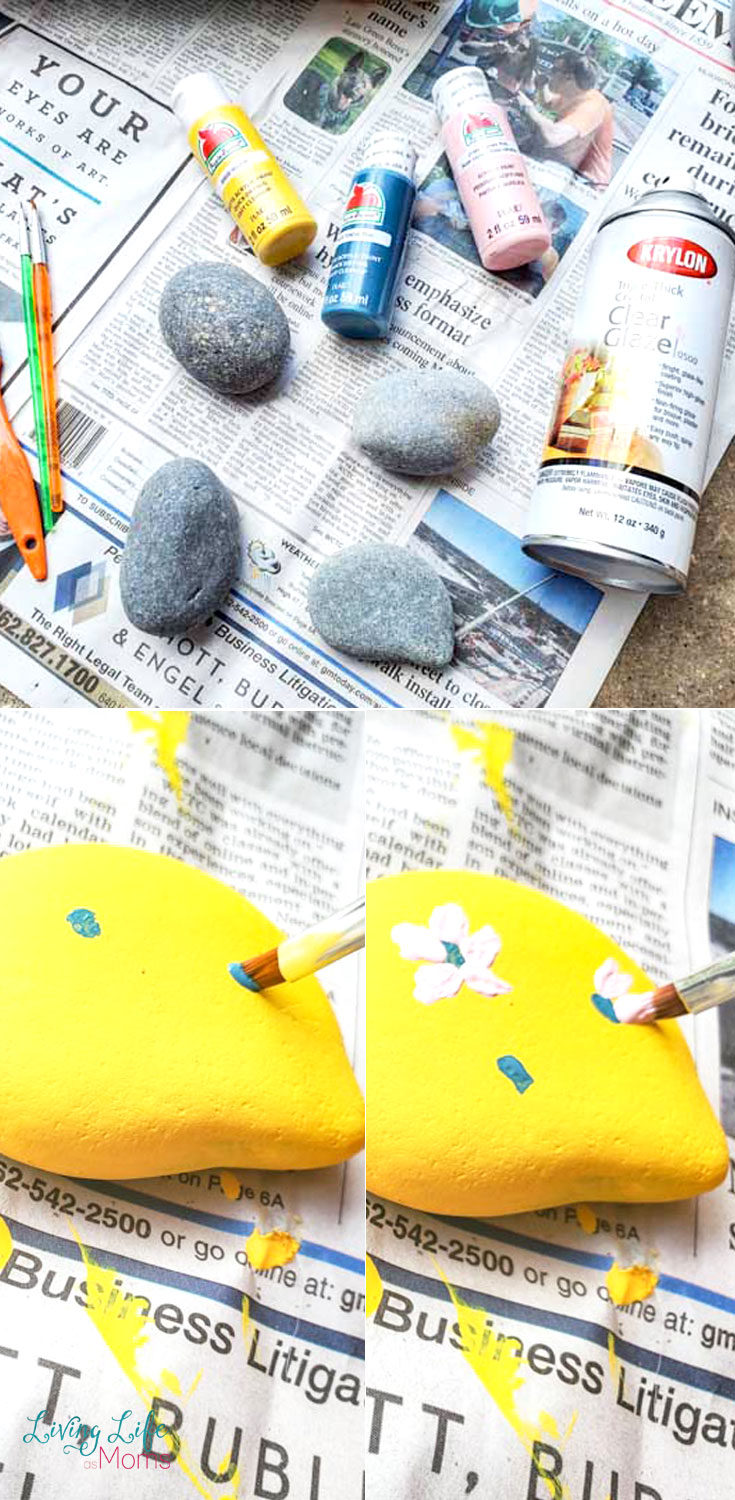
Start by laying down the newspaper to cover any surface areas. Use the paintbrush (1-inch) and paint the entire rock. We painted one rock blue, one rock yellow, and one rock pink. (but you can totally choose other colors if you want)
Let the rock dry on one side before flipping and painting the backside. Allow drying as well.
Just be aware that depending on the color of the rock and the paint, it may take a few coats per rock.
After you’re happy with how your rocks look and they’re totally dry, it’s time to start painting on the flowers. Using the paintbrush with the slanted edge, make dots on the rock, about 1/2 inch or so from the edge. Swirl the brush into a circle and repeat this simple motion until you have 3 circle shapes.
Once done, take and clean the brush and use it to dip into the other color. Using the longer part of the brush, touch the rock at the base of the circle area and press down to begin to make the petals.
If you’re not crazy about that, you can freehand and make your own petals using the tip of the brush.
Let your rock dry all the way.
Once they are dry, take and spray each rock with the clear glaze to protect. Let that dry as well.
See how simple this craft is?! If you’re ready to put your own finishing touches on some of the rocks around your house, here is a printable version for you!

Flower Painted Rocks Craft
This is such a great craft! The kids will love making this flower painted rocks craft!
Materials
- River Rocks
- Acrylic Craft Paint - various colors
Tools
- Paintbrush (1-inch)
- Slanted paintbrush
- Paintbrush with a pointed tip (optional)
- Krylon Clear Glaze
- Newspaper or other barrier
Instructions
- Start by laying down the newspaper to cover any surface areas. Use the paintbrush (1-inch) and paint the entire rock. We painted one rock blue, one rock yellow, and one rock pink. (but you can totally choose other colors if you want)
- Let the rock dry on one side before flipping and painting the backside. Allow drying as well.
- Just be aware that depending on the color of the rock and the paint, it may take a few coats per rock.
- After you're happy with how your rocks look and they're totally dry, it's time to start painting on the flowers. Using the paintbrush with the slanted edge, make dots on the rock, about 1/2 inch or so from the edge. Swirl the brush into a circle and repeat this simple motion until you have 3 circle shapes.
- Once done, take and clean the brush and use it to dip into the other color. Using the longer part of the brush, touch the rock at the base of the circle area and press down to begin to make the petals.
- If you're not crazy about that, you can freehand and make your own petals using the tip of the brush.
- Let your rock dry all the way.
- Once they are dry, take and spray each rock with the clear glaze to protect. Let that dry as well.
Like this flower painted rocks craft? Don’t forget to check out some of our other fun rock painting ideas!
You’ll also love these super cute ladybug rocks that you can do with just a few simple steps.
Your painted rocks deserve to be seen by the world. Don’t forget to share them with others and spread some happiness. Here is some inspiration for flower themed quotes and captions for your Instagram.
More Rock Painting Ideas
Angry Birds Painted Rock
Easy Rock Painting Ideas


Great project for this kids.
Yes! So fun.