How to Paint a Ladybug Rock

Looking for a fun project to do with your kids? See how to paint a ladybug rock. Whether it’s with your kids or for your garden, it’s a fun and easy project that will keep you entertained for hours.
If you love rock painting, make sure to check out more easy Painted Rocks Ideas!

Once you’re done painting your rocks, be sure to share a picture of them. I can’t wait to see them!
Keep reading to know more about rock painting and get started on your very own ladybug rock!
What is rock painting?
Rock painting or rock art is a fun and easy activity that anyone can do. All you need are some rocks (preferably smooth but it depends on your design), some paint, and a little bit of imagination.
Rock painting has been around for centuries, and it’s an opportunity to express your creativity. Plus, it’s a lot of fun and a great way to add a personal touch to your garden or yard. You can use river rocks to create unique designs or paint inspirational messages.
Just find some rocks that you like, and start painting them. You can paint anything you want – flowers, animals, trees, landscapes, whatever you can think of.
If you’re feeling creative, you can even paint your own name on the rock. You can even get your kids involved by having them paint rocks of their favorite animal or thing.
Once you’re done painting, put your rock somewhere special – in your room, in the garden, or even in the park. Then sit back and enjoy your work of art!
Recommended Rock Painting Books
If you need more rock painting ideas, check out these rock painting books for beginners. You’ll learn a lot of things like how to pick rocks, what designs fit the rocks you have, and how to handle them.
Rock Painting for Kids: Painting Projects for Rocks of Any Kind You Can FindRock Painting For Beginners: Simple Step-by-Step TechniquesRock Art Critters: Paint the Perfect PebbleMy First Rock Painting Book: 35 fun craft projects for children aged 7+ROCK PAINTING FOR BEGINNERS: A detailed beginner’s guide with pictures to learn the skills and techniques for creative rock painting projects with easeRock Art Handbook: Techniques and Projects for Painting, Coloring, and Transforming Stones (Fox Chapel Publishing) Over 30 Step-by-Step Tutorials using Paints, Chalk, Art Pens, Glitter Glue & More


How do you prepare rocks for rock painting?
If you want to get started in rock painting, the first thing you need to do is gather some rocks. You can find rocks just about anywhere, but it’s best to avoid rocks that have been treated with chemicals or that have sharp edges.
Look for rocks with smooth surfaces since they’re easier to paint.
Once you’ve collected your rocks, give them a good wash with soap and water. This will remove any dirt or debris that might interfere with your paint job. Once the rocks are clean, let them dry completely. This will help ensure that your paint job is smooth and even.
With your rocks prepped and ready to go, you’re now ready to start painting!
Recommended Rock Painting Kits
Start painting rocks instantly with these awesome rock painting kits for kids and adults alike. Grab the Dezzy’s Workshop – Rock Painting Kit that comes with 10 smooth river rocks, googly eyes, and a complete set of painting supplies. If you and your kids love ladybugs, get the Ladybug Rock Set instead.


Supplies:
- River rocks (try to find the flatter ones)
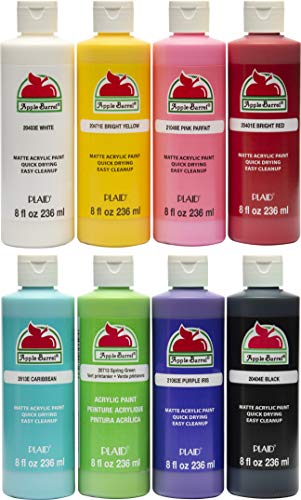
- Red, black, and white craft paint
- Paint brushes – 1” foam, ¼” flat angled artist brush, foam dabber
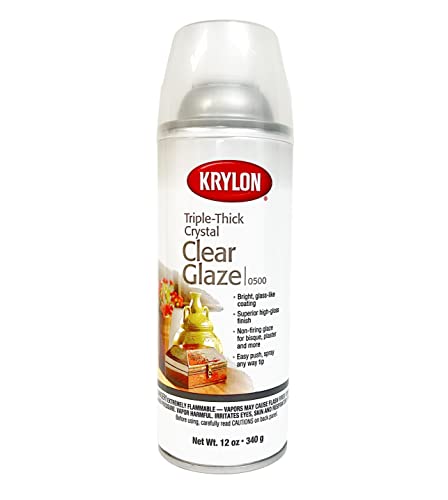
- Krylon Clear Glaze
Apple Barrel Acrylic Craft Paint Set, Matte Finish, Set of 8, 8 Fl Oz (Pack of 8), AssortedLinzer 8500 0100 Paint Brush, 1Krylon Triple Thick 12 Oz. Clear Gloss Spray Gives The Illusion of Depth On Surfaces Such As Ceramics, Bisque, Clay, and Plaster (Pkg/2)


Directions:
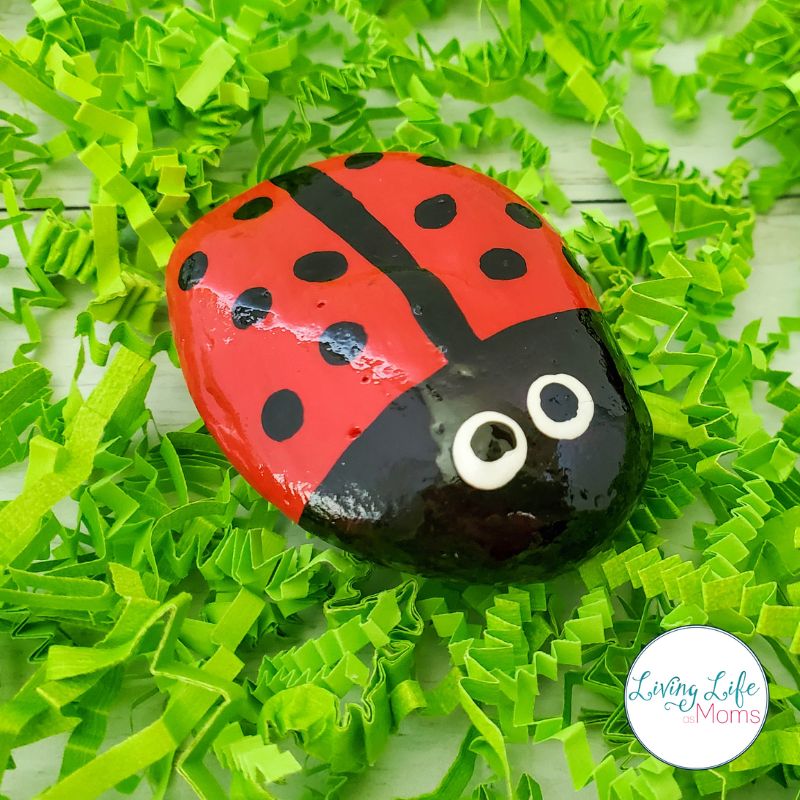
- Coat the entire rock red using the 1″ foam brush. Allow to dry and repeat until needed. You can use a blow dryer if you want to speed up dry time.

2. Paint the “head” of the ladybug using the 1/4″ flat angled artist brush.

3. Flip the brush to use the narrow part then paint a black line down the center of the “body”. Allow time to dry.

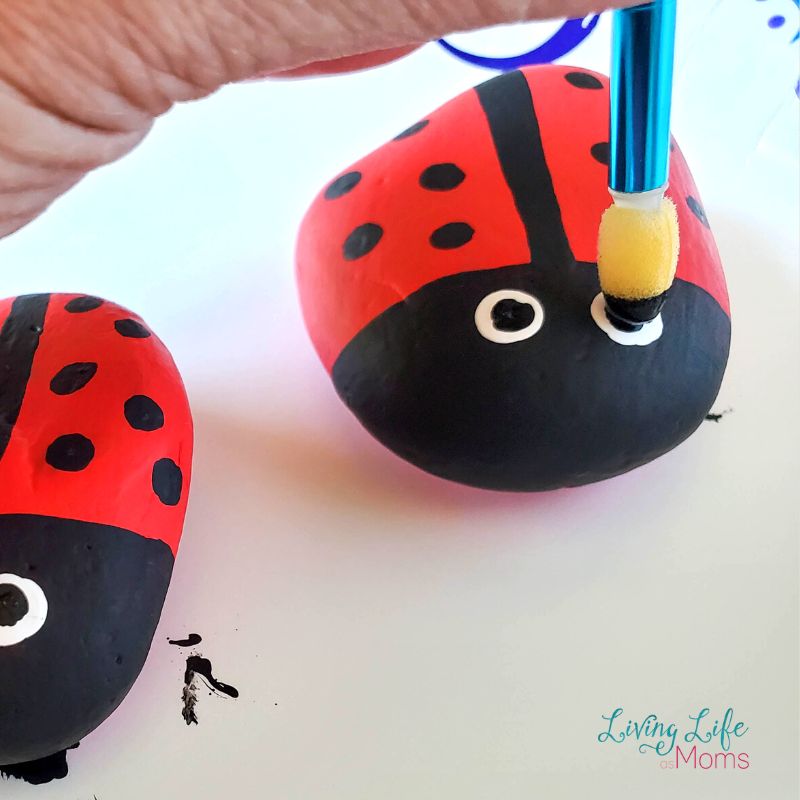
4. Use the foam dabber with the black paint to make spots all over the body.

5. Use the foam dabber with white paint to make the eyes, and allow to dry.

6. Use the foam dabber again, to just put a tiny dot of black paint in the middle of the white to finish the eyes.
7. Once the rock is completely dry, spray with Krylon Clear Glaze to seal the paint, and protect it from the outdoor elements.

There you have it! Now, prepare your supplies and start with your own ladybug rocks.

How to Paint a Ladybug Rock
Follow these easy steps on how to paint a ladybug rock. Perfect for beginners!
Materials
- River rocks (try to find the flatter ones)
- Red, black, and white craft paint
- Paint brushes – 1” foam, ¼” flat angled artist brush, foam dabber
- Krylon Clear Glaze
Instructions
- Coat the entire rock red using the 1″ foam brush. Allow to dry and repeat until needed. You can use a blow dryer if you want to speed up dry time.
- Paint the “head” of the ladybug using the 1/4″ flat angled artist brush.
- Flip the brush to use the narrow part then paint a black line down the center of the “body”. Allow time to dry.
- Use the foam dabber with the black paint to make spots all over the body.
- Use the foam dabber with white paint to make the eyes, and allow to dry.
- Use the foam dabber again, to just put a tiny dot of black paint in the middle of the white to finish the eyes.
- Once the rock is completely dry, spray with Krylon Clear Glaze to seal the paint, and protect it from the outdoor elements.
Notes
Preparation and painting of rocks will take about 15 to 20 minutes. Drying time depends if the rocks will be air-dried or with the help of a blow dryer. Some are leaving the painted rocks to dry overnight before sealing.
Recommended Products
As an Amazon Associate and member of other affiliate programs, I earn from qualifying purchases.


Do you have other creative ideas in mind? Whatever your motivation, rock painting is a fun way to express your creativity. And who knows, you might even end up with a masterpiece!
More Rock Painting Ideas
How to Make a Watermelon Painted Rock
Thanksgiving Painted Rocks Craft
Painted Rocks Easy Bee Craft by Homeschool Preschool