The Simple, Best Monthly Bill Organizer That Works!

Here’s my DIY super-easy Monthly Bill Organizer – it makes paying bills fast and keeps your due dates straight, so you never miss a payment!
Want to know how to organize your monthly bills, pay them on time, and slash the time spent paying them all in half? Keep reading!
How to Keep Track of Bills the EASY Way
As much as I love my calendar, it has steered me so wrong whenever I tried to use it to keep track of my monthly bills.
I tried every bill organization tutorial out there and finally realized my problem was that I was using my calendar, and paying each bill as it became due.
Paying your monthly bills by “due date” is a HUGE waste of time! Here’s why:
- It clogs your calendar with a bunch of bills, each due on a different day. Your calendar becomes messy and busy, it’s visually stressful for something you’re looking at several times a day; and
- You have to pull out a different bill 12 or 13 times a month every time your calendar dings you to pay just the rent, or just the car insurance, or whatever it is.
I scrapped the calendar idea and started organizing my bills by Payday instead of by Due Date. Now, since I get paid bi-weekly, I only have to pay bills two times a month!
If you get paid weekly, you only have to pay your bills four times, instead of 14!
That’s a HUGE time-saver!
Paying your bills by pay day (especially by using a monthly bill planner/organizer like this one) gave me some MAJOR benefits:
Benefit #1: It drastically reduces time spent on having to come up with a system to remember when your bills are due; and actually paying your bills.
Your rent is due the 1st, your cell phone the 5th, your electricity the 17th, your car insurance the 12th, your internet the 4th …….. Having to take out each bill and grab your checkbook or get on the phone, or sit at your computer & pull up your account, for each day each of your bills is due is TOO MUCH WORK.
If you keep everything together with just a consistent few days each month where literally the money comes in & goes out same day, you’ll have a clear picture of your real monthly financial situation.
Benefit #2: It keeps the money from disappearing.
If you are prone to spending and have a hard time keeping cash in your account from when you get paid until your bill is due, getting the money out on payday will help keep your bills paid and your spending under control.
Using a monthly bill payment log like this one, also helps you see how much spending money you actually have for spending, after your bills are paid for the month.
I’m going to show you how to make your own DIY monthly bill payment organizer right now! All you need is a notebook and a pencil.
Before we start, if you are a total noob with money, I HIGHLY recommend a book called The Index Card, by Helaine Olen & Harold Pollack.
This book really helped me see my “big picture” financially. It has simple, straightforward advice about what you need for basic financial security in your lifetime. It all really does fit on an index card, couldn’t be simpler.
Free Bill Organizer Template
By the way, if you love this system, I made a super-easy worksheet to put your due dates and your pay days together in one place. Make sure to grab your free Budget Printables, including your Free Bill Organizer Template by signing up to my email list!

How to Make a Monthly Bill Organizer:
Step 1: Grab a Cheapo Spiraled Notebook.
Here’s the deal: Depending on how many times a month you get paid (or pay yourself), you only need anywhere from 12 to 52 pages TOTAL in your “Bills Book.”
That’s ONE page (front & back) for each pay period of the year.
Obviously most notebooks don’t come that thin – I personally pay myself twice monthly, so I purchase a 90-page Mead spiraled notebook at Target which will last me 3 years of payments, plus some extra scribble room (90 pages ÷ 26 pay periods per year = 3 and a half years).
If you get a weekly paycheck, make sure your notebook has more than 52 pages, or if you’re looking for it to last longer, more than 104 pages, or 156 pages….you get the idea.
At the end of the year I rip out the used pages and start fresh!
Step 2: Write Down Each Payday for the WHOLE YEAR.
Here’s the fun part: Each page of your Bills Book represents each time you get paid for the whole entire year.
Grab a calendar for reference and find the date you will be getting your next payment.
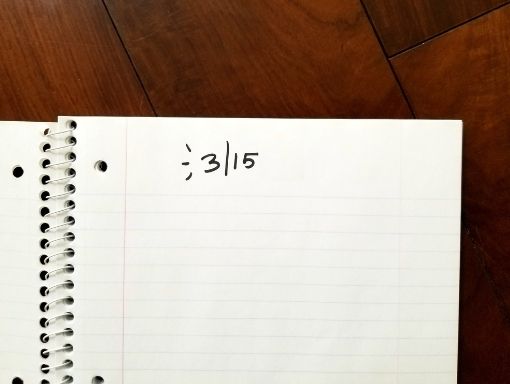
When are you expecting your next paycheck? Write this date at the top of the first page of your Bills Book.
When are you expecting the next paycheck after that? Write THAT date at the top of the next page of your Bills Book:
Do you get paid every other Friday? The 1st and 15th of each month? Every Thursday? Write each pay day on a separate page of your Bills Book. Don’t stop until you get to the last payday of the year!
It’s so exciting to think ahead to each payment and really visualize my progress. I can focus and see my goals manifest, it’s super-motivating!!
Step 3: Add your “Money In” categories
On the left side of your paper, list the following categories:
- In Account,
- +Paid,
- Total In:

These are your MONEY IN Categories – the money you have IN your account on payday PLUS that day’s new paycheck you are putting IN/direct depositing.
That tells you how much money you have to pay your bills!
Step 4: Record your Bills by Pay Period.
Now it’s time for your Monthly Bill Organizer to come to life!
Under your MONEY IN categories you will be listing your MONEY OUT categories…..your bills!
These are any bills you pay on a regular basis – here are some examples:
- Monthly Rent/Mortgage
- Car Note
- Car Insurance
- Health Insurance
- Debt Installment Plan Payments
- Electricity
- Gas
- Telephone/Cable/Internet
- Cell Phone
- Automatic Savings
QUICK TIP: Keep your book wherever you drop your bills as they come in, so you won’t have to go looking for it.
For me, that’s next to my office desk in the folder where I keep my bills.
Whenever you get a bill, find the NAME, DATE DUE and AMOUNT DUE on your bill.
Enter the NAME, DUE DATE & AMOUNT DUE on the page with the closest payroll date before your bill’s due date.
Once your Payroll Date comes, you will have a list of all of the bills to be paid with that paycheck:
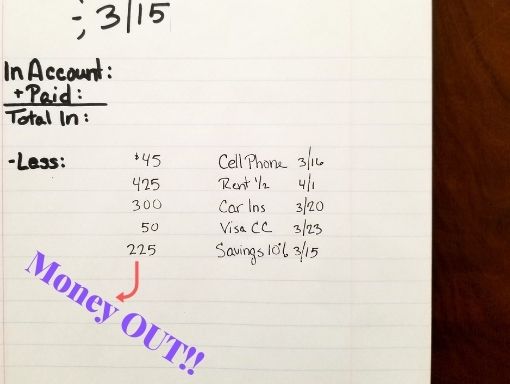
Super Organized!!!!! As you can see in the picture, all of these bills are due after March 15th, but before the next closest payroll date.
Step 5: Payday is Here! Record How Much You Got Paid.
Each time you get paid, record it in your notebook:
- Turn to the page with the correct payroll date for your payroll.
2. Go to your Bank Account statement and find your balance BEFORE your paycheck was deposited (if you have direct deposit, this is the amount RIGHT BEFORE the payroll was received).
3. Enter that amount next to “In Account” in your Bills Book.
4. Grab your check stub or direct deposit slip and enter the amount you got paid next to “Payroll” in your Bills Book.
5. Add up the first two lines to get your TOTAL IN – enter that amount next to “Total In” in your book.
6. Compare your total with the total amount in your bank account – are they the same? fantastic!
Related: Paper Clutter Organization: How to Eliminate Paper Clutter + Folders Checklist!
Step 6: Money Out!! Pay your bills on your Payday.
Get ready to pay those bills!
First, Make Sure You Have Enough Money to Pay The Bills:
1. Take a look at the MONEY OUT bills for this pay date. Add up each amount due to get your Total Out.
2. Subtract your TOTAL OUT from you TOTAL IN – do you have rough money left over after paying your bills to buy food, gas, toiletries, etc? Great!
Now’s also a good time to take a good look at that leftover amount in your account.
In a perfect world, we’d all have more than enough for all these bills, plus food, clothes, toiletries, gifts, car repair & maintenance, long-term savings goals, and out-of-pocket medical copays.
Make sure you’re on the right track with a solid monthly budget***
Related: Here Are The BEST Books About Finance To Start Your Year Off Right
Next, time to pay those bills!
1. Do you have any bills on auto pay? Check your bank account statements to see if any of those bills have been automatically paid already.
2. Write a check next to those already-paid bills in your Bills Book.
3. Pay all of the rest of the bills on your MONEY OUT list and write a check next to those bills once you pay them.

You’re Done!! Your Monthly Fixed Bills Are Paid!!
That’s How to Organize Your Monthly Bills
This easy DIY bill organizer keeps your bills paid on time, and out of your hair! I truly hope this is helpful in keeping your calendar space free for your important things – please sign up for my newsletter & get your free Budget Printables, including your free bills organization printable template:
Once you’ve got your fixed bills paid, check out this Cash Envelopes Set in my Printables Shop, to easily keep track of your day-to-day spending!
What’s your biggest budget gripe? What’s the one thing you CAN’T STAND organizing? What can make my Bills Book better for you? Tell me in the comments, I love to hear from you!
-Mina xo
P.S.: Here Are Some More Posts You May Find Helpful: