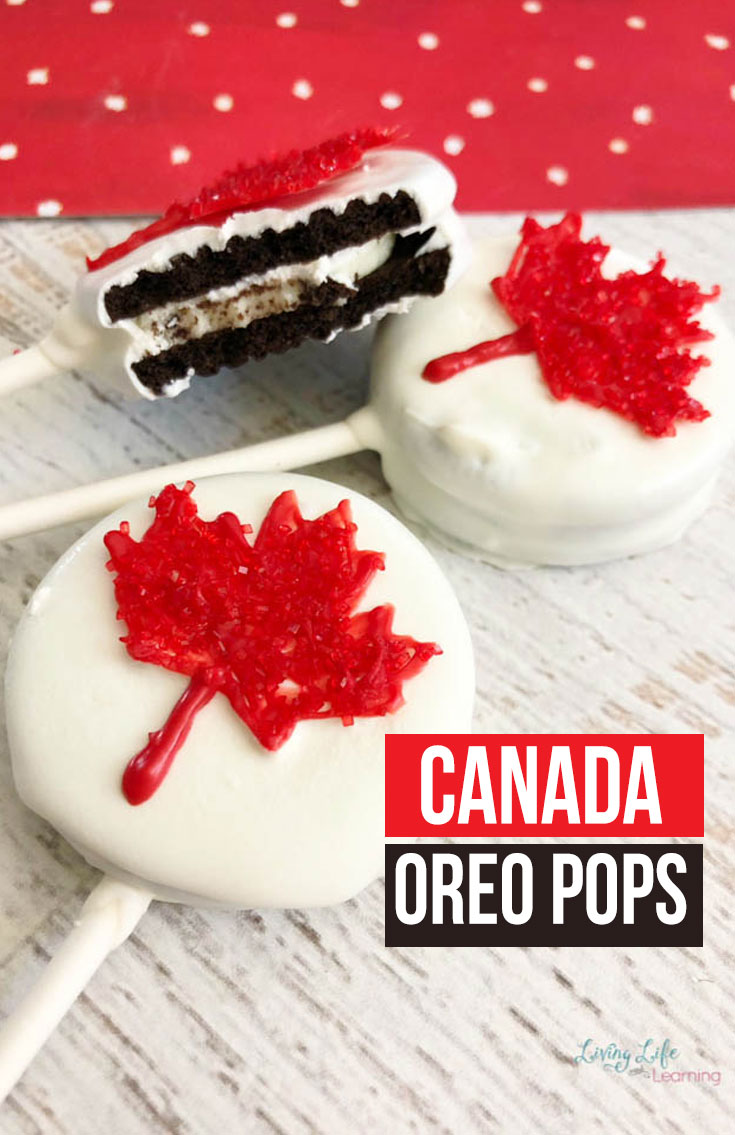
Yummy Canada Oreo Pops
Canada Day is right around the corner. Are you celebrating? It is one holiday that most of the country is having block parties, family get togethers, barbeques, or enjoying time on a lake. Which I love.
I enjoy putting up Canada decorations and making a big deal out of such an important national holiday. It’s just a fun reason to celebrate and add some fun festivity to the home.
Of course, some of us enjoy with our favorite beverages but we need something special for kids too! One of my favorite things is to create delicious snacks. These Canada Cupcakes are delicious but kids typically tend to lean towards these amazing Canada Day Oreo Pops. They clearly have an amazing taste but they also are perfect for carrying around.
That makes them perfect for barbeques or any fun holiday party! My kids even like to help make these delicious treats and since they are so incredibly easy, I like letting them help! When they are all done we have a tray of delicious Canada Day Oreo Bites that make for the most delicious treat!
Make certain to check out our Delicious Canada Cupcakes as well for another easy and delicious treat.
Canada Oreo Pops
I’m always looking for simple treats that the kids can grab and eat. This is because when they’re hungry, they want it now. The best part about these fun Oreo pops is that they’re really fast and easy to make and so much fun to eat. The kids love that they feel like they’re eating a sucker but biting into an Oreo instead!
The next time that you’re thinking you want something Canada-themed to eat and enjoy, these fun Canada Oreo Pops are the best. In a short amount of time, you’ll have many to choose from that are certain to go quickly.
The kids can even pop in and help out with this fun snack idea. Since it’s so easy to do there is no reason that they can’t join in and help.
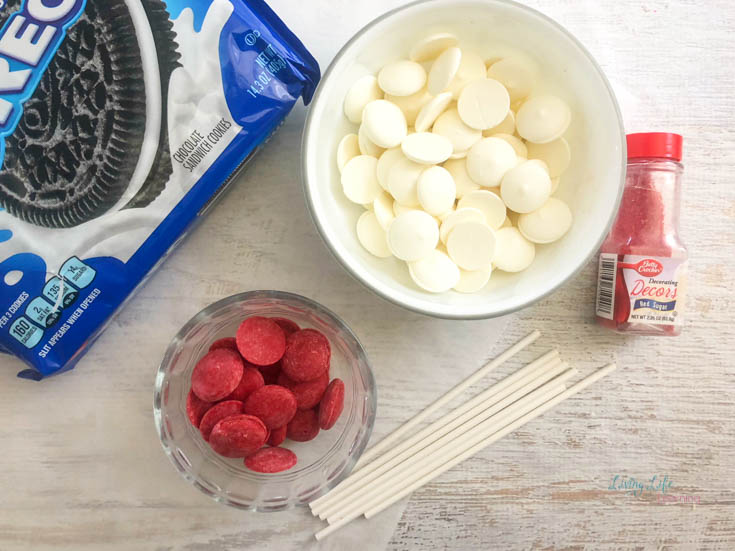
Oreo Pop Supplies
All you need to get started is listed below. You’ll find that once you get started they’re really fun and easy to make.
- white candy melts
- red candy melts
- Red sugar sprinkles
- Lollipop sticks
- Parchment paper
- Decorating bag


How to make Canada Oreo Pops
One thing that you’re going to find with this fun snack is that there are actually a lot of ways to make it fun to eat. The kids will love being able to help with this simple and easy dessert recipe. Not only is it fun and easy to make but it’s just a really easy way to bond together as well.
When I tell you that this recipe is easy to do, it really and truly is! You’ll find that the following steps are ones that everyone can easily help out with in the house.
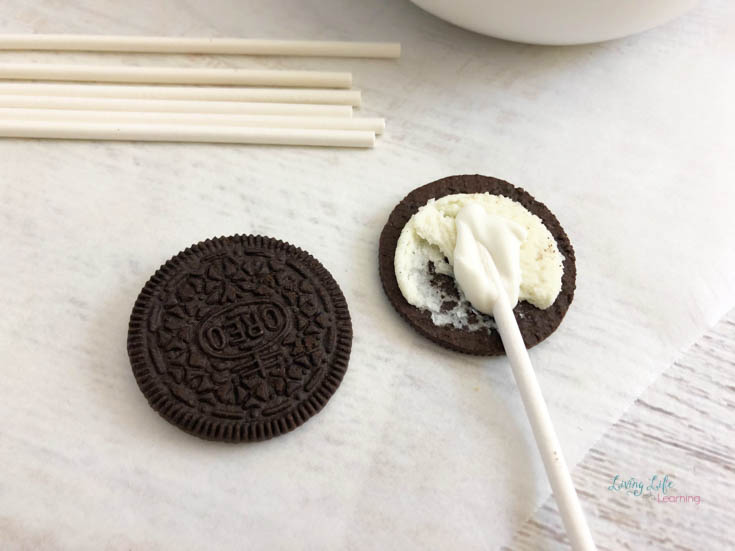
Lay out a piece of parchment paper onto a baking sheet. This helps so that the chocolate wafers don’t stick and it makes for super simple and fast clean up, too!
Heat your white candy melts in a small bowl on 50% power in the microwave for 3-4 minutes, stirring every 30 seconds until melted. The biggest tip to remember here is that you don’t want to overheat and burn the candy melts! If you burn them at all, you have to tos and start all over again! No one wants to do that as it’s a big waste!
Open each Oreo, dip the end of each lollipop stick heavily into the melted chocolate and press your stick carefully onto the white filling. Be very careful while doing this because you don’t want to break the Oreos. Most should just twist apart easily but some might take a bit more force.
Scoop a little extra melted candy melt onto the center and press the cookies together. The kids can really help with this step because it’s a fast and easy thing for them to be a part of.
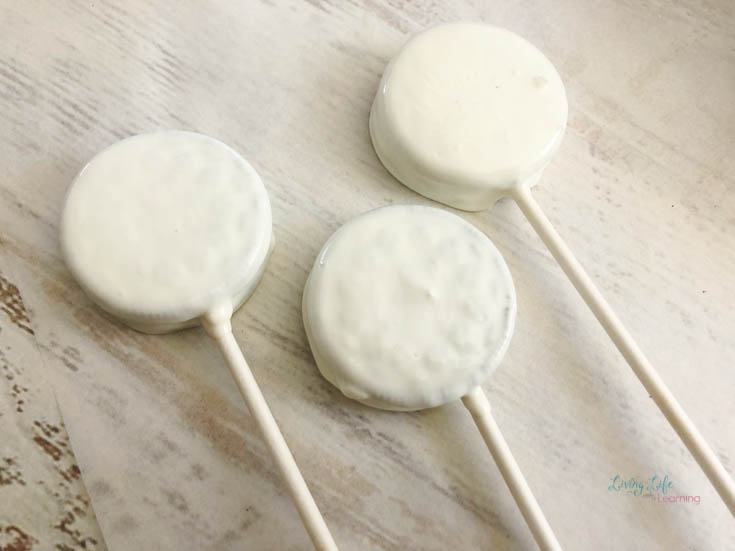
Allow the chocolate to harden (transfer to the freezer for 5 minutes) then hold the stick and dip the Oreo into the melted chocolate, letting any excess drip off. Again, this is another fun activity for the kids to take charge of. They’ll love holding on to the handle and dipping the Oreos. Make certain that they’re patient in letting the excess chocolate melt off.
Place the Oreo pops onto your parchment paper lined baking sheet and transfer the sheet to the freezer for 10 minutes. It might take a bit longer than 10 minutes but it shouldn’t be too much longer than that.
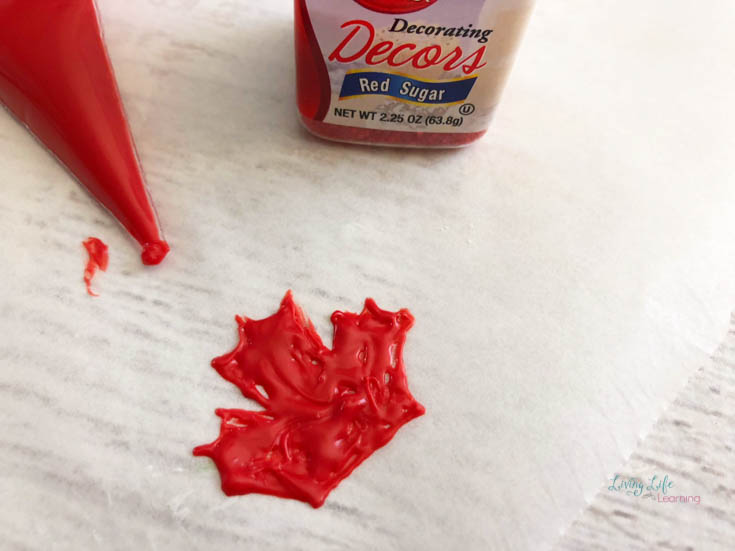
Heat your red candy melts on 50% power for 3-4 minutes, stirring every 30 seconds until melted, pour into a decorating bag, and cut a tiny tip off the bottom. The same principle applies here as it did with the white ones. Don’t burn them.
Use the melted red candy decorating bag to draw little maple leaves onto the parchment paper, top with sprinkles, and transfer to the freezer for 10 minutes. Be artistic here! Have fun with the process. You just might surprise yourself!
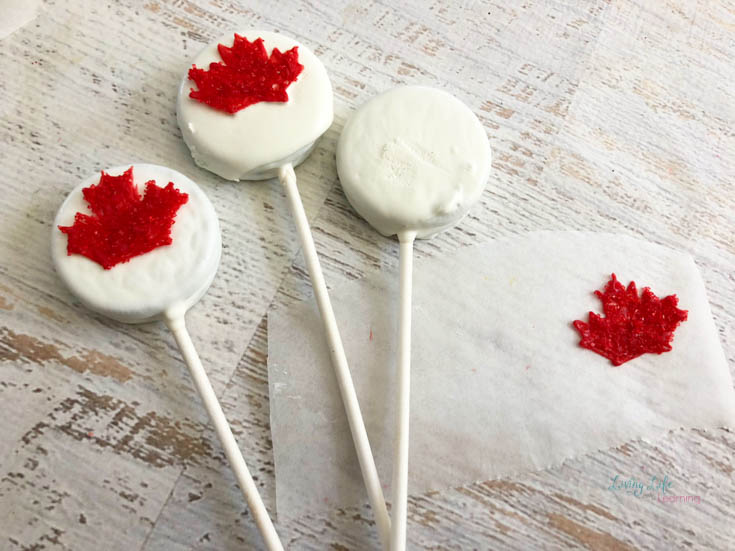
arefully peel off each maple leaf, place a little melted chocolate onto the back of the leaves and onto the center of the white chocolate covered Oreo. The contrast of the red on the white is so pretty!
Use the decorating bag to draw a stem onto each leaf and let harden. This is something that the kids like to do to really finish off the look.
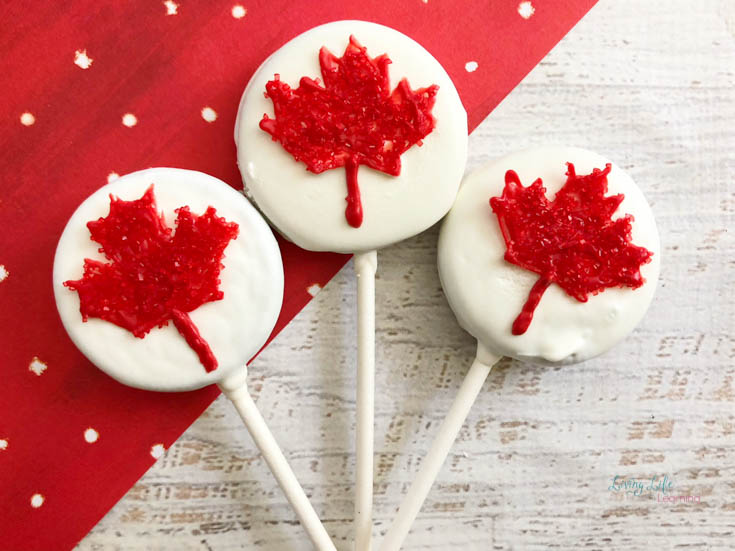
I mean, WOW. Don’t these look absolutely delicious? These will be the hit of the day! You’re going to have to remind the kids that one at a time is all that they’re going to be able to eat!
The good thing is that they’ll stay good for several days once you make them so there will be plenty of time to eat them all!
Canado Oreo Pops

The kids are going to love these Canada Oreo Pops!
- 2 cups white candy melts
- 1 cup red candy melts
- Red sugar sprinkles
- Lollipop sticks
- Parchment paper
- Decorating bag
Lay out a piece of parchment paper onto a baking sheet.
Heat your white candy melts in a small bowl on 50% power in the microwave for 3-4 minutes, stirring every 30 seconds until melted.
Open each Oreo, dip the end of each lollipop stick heavily into the melted chocolate and press your stick carefully onto the white filling.
Scoop a little extra melted candy melt onto the center and press the cookies together
Allow the chocolate to harden (transfer to the freezer for 5 minutes) then hold the stick and dip the Oreo into the melted chocolate, letting any excess drip off.
Place the Oreo pops onto your parchment paper lined baking sheet and transfer the sheet to the freezer for 10 minutes.
Heat your red candy melts on 50% power for 3-4 minutes, stirring every 30 seconds until melted, pour into a decorating bag and cut a tiny tip off the bottom.
Use the melted red candy decorating bag to draw little maple leaves onto the parchment paper, top with sprinkles and transfer to the freezer for 10 minutes.
Carefully peel off each maple leaf, place a little melted chocolate onto the back of the leaves and onto the center of the white chocolate covered Oreo.
Use the decorating bag to draw a stem onto each leaf and let harden.
More Canada Food Ideas
Don’t miss out on these other fun and festive Canadian treat ideas!